The langify switcher has three different placement options. In this guide you can find instructions on how to add your language switcher with a Custom placement. This option allows your to add the switcher in a customizable position virtually anywhere in your theme.
In case you're looking for more information about the Fixed and Absolute placement, please have a look at our Placement guide.
This is an advanced guide that require some basic experience with HTML and Liquid as it is necessary to add a line of HTML code within your theme code.
If you're not comfortable editing your theme, please don't hesitate to reach out to us at support@langify-app.com and we'll be happy to help.
Watch our video or check our step-by-step guide for a Custom switcher placement below.
Both examples use Shopify's Dawn theme.
Video
Step-by-Step Guide
Step 1 — Set the Switcher Position to Custom
In the langify Switcher Configurator, go to Placement and choose Custom as the Position. A prompt appears with a short HTML snippet you can copy. You’ll later paste this into your theme code as the marker.

Step 2 — Find a Reference Point in Your Storefront
Now you need to find the specific code snippet where you want to add the language switcher marker. Note that every theme is different and some can be very complex, which makes it tricky to find the right place in the code.
In this example we are going to place the language switcher next to the search icon in the header of the "Dawn" theme:

In order to find the right place in the theme code, we copy the class of the search icon. To do this, you can use your browser's Inspect-tool. Right-click on the search icon and then select Inspect in the menu.
In the screenshot below you can see the class "header__search" inside the Inspect-tool:

Step 3 — Open the Theme Code Editor
In the next step, open the theme code editor of your theme in Shopify. To do this, go to Shopify > Online Store, and once you are on that page, click the ••• icon next to Edit theme, then Edit code.

In most themes the header file can be found by simply typing "header" into the search bar:

Step 4 — Find the Right Place in the Code
Now that the correct code snippet has been found, we look for the class of the search icon "header__search".
For a text search within one specific snippet, press Ctrl+F and enter your search term:

Step 5 — Add the langify Code Marker
If you haven't already, you can now copy the HTML code from the langify Switcher Configurator, and paste it above the "header__search" line.

Finally, your language switcher should appear to the left of the search icon inside the theme's header:

Reverting Your Changes
If something goes wrong while editing the theme code, you can restore the file to an earlier version using Shopify's built-in file history.
- Open the file in the theme code editor.
- Click on the Timeline tab in the explorer on the left side.
- Select the version you want to go back to.
- Right-click the version to find the Restore Contents option.

For more details, see Shopify's guide on editing theme code.
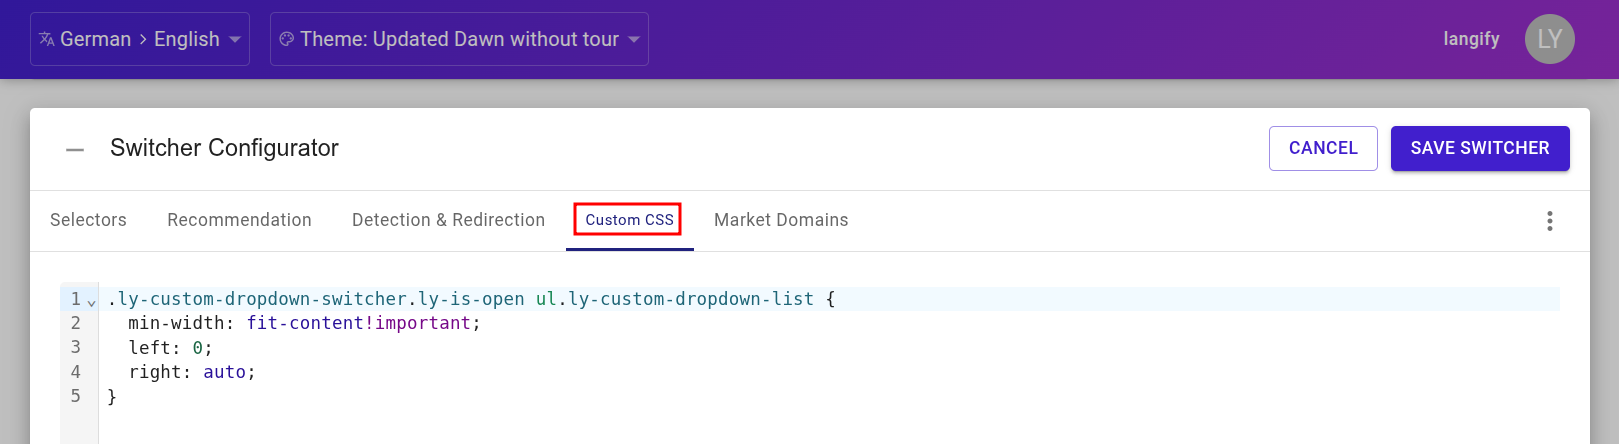
Custom CSS
Even when putting the switcher as close as possible to the right area, it may need some further adjustments to align it exactly with the other elements. Most customizations, such as color and spacing, can be found as native options inside the Switcher Configurator.
However, in case you would like to add specific CSS to your switcher, the langify Switcher Configurator offers a Custom CSS area where you can do this.
Alternatively, you can of course also add custom CSS directly within your theme's own CSS files.