You can add, edit and delete your languages in langify when you open the Languages section in your Dashboard.
This is also where you can publish your language. Find more on this topic further below.
Add a New Language
Click on the blue button Add New Language in the upper right corner of the Languages section. Choose a language from the menu and save.
A newly added language is unpublished by default. In order for your customers to visit the translated pages, please remember to publish the language as explained below.
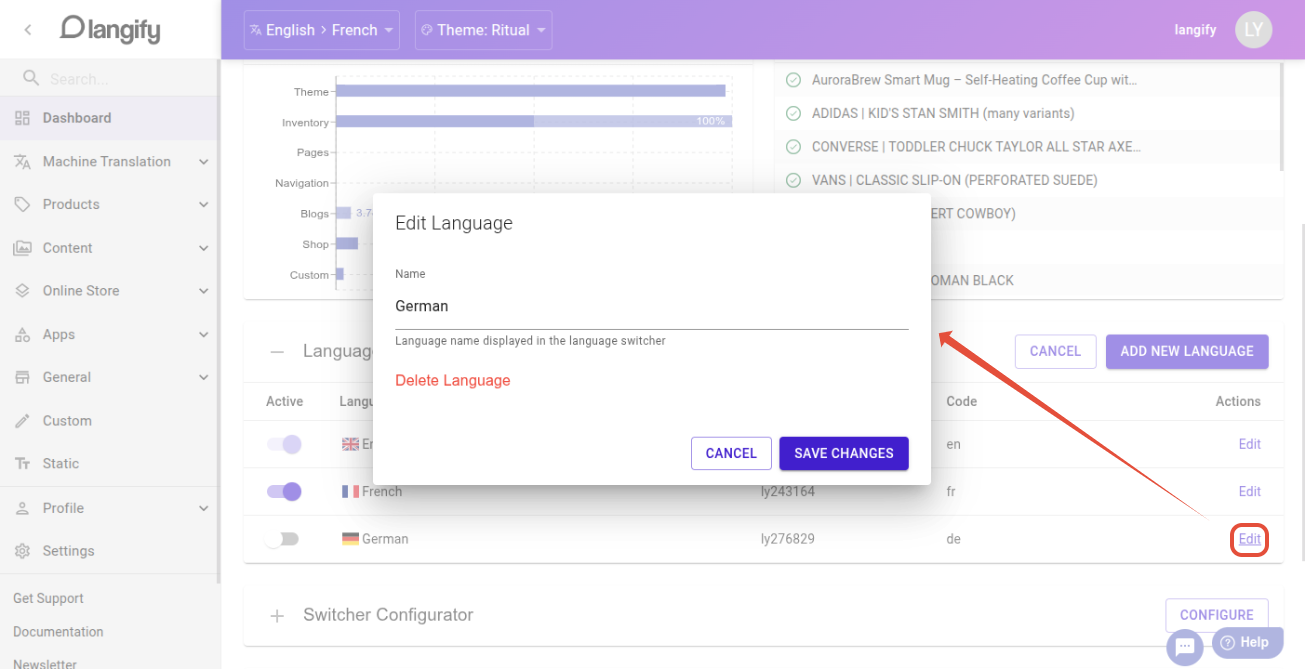
Edit or Delete a Language
Click on Edit to the right of an existing language for further options. Here you can edit the name of the language, or delete it completely.
If you click on Delete Language, a final popup will appear, asking you to confirm the delete. Afterwards, the language and all its translations will be removed from your store.
Publish a Language
To manage the publication status of your languages, follow these steps in your Dashboard:
- Go to the Languages section.
- Click on the slider option to the left of the language. Grey means unpublished, blue means published.
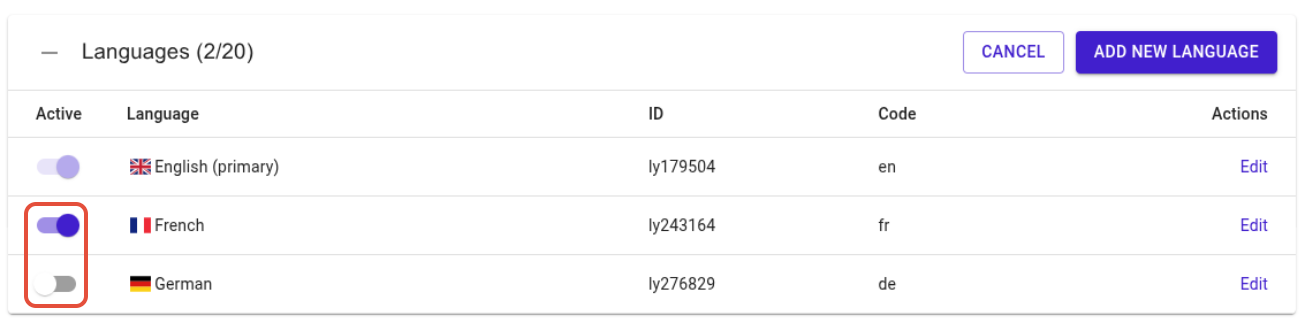
This option is useful when you're introducing a new language to your live store. Leave the language unpublished until you have finished the translations.
After publishing your language, assign it to a domain or market in Shopify. Depending on your setup, this is either done in the Shopify Languages or Market settings. For a complete overview have a look at our guide How to assign languages to domains/markets.
Watch a step-by-step guide on how to publish a language and assign it to a domain: