You can use the export option in langify to back up your translations or to edit them outside the app. This is useful if you want to edit multiple translations in bulk or regularly add translations from an external source, such as a professional translator.
The export can also be used to migrate translations between two different Shopify stores. Helpful Shopify resources:
When migrating translations between stores, please use the simple CSV export format.
Please note that each section has to be exported individually in langify.
You can export or import the following sections:
- Theme
- Products
- Product metafields
- Collections
- Pages
- Navigation
- Blogs
- Articles
- Custom
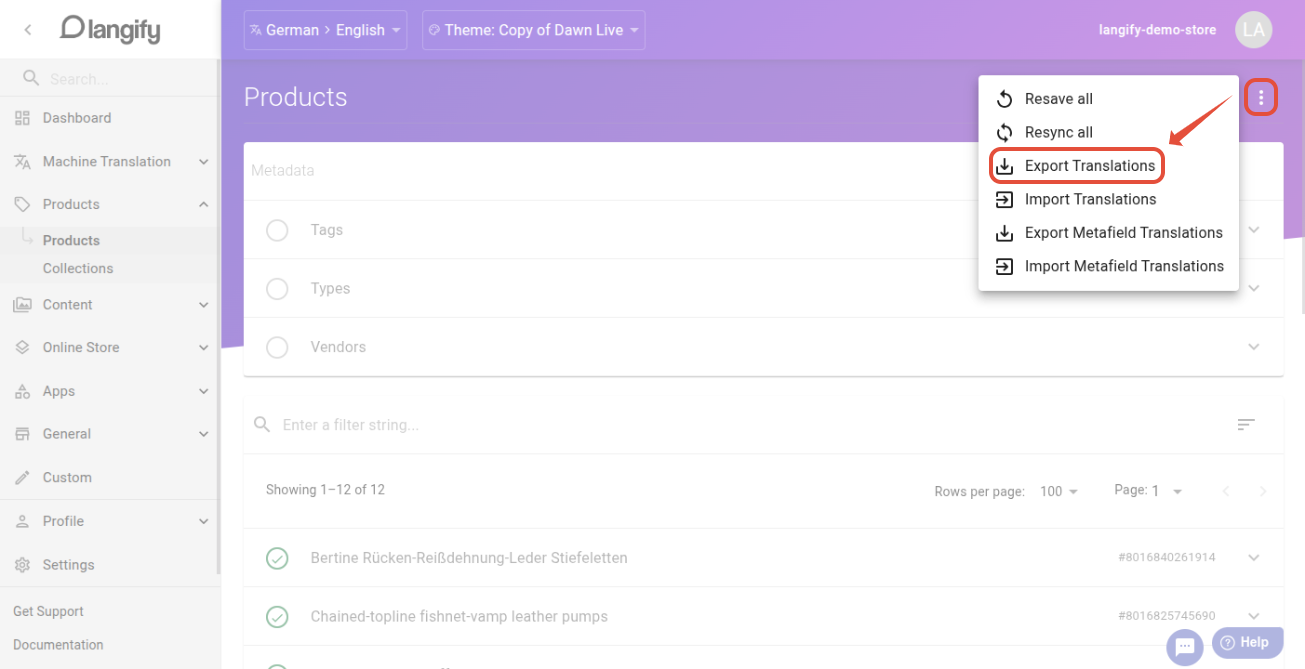
Select the section to export (e.g., Products). Then click the three dots in the top-right and choose Export Translations.
Depending on the section, clicking on Export Translations will prompt a popup with additional options to choose from:
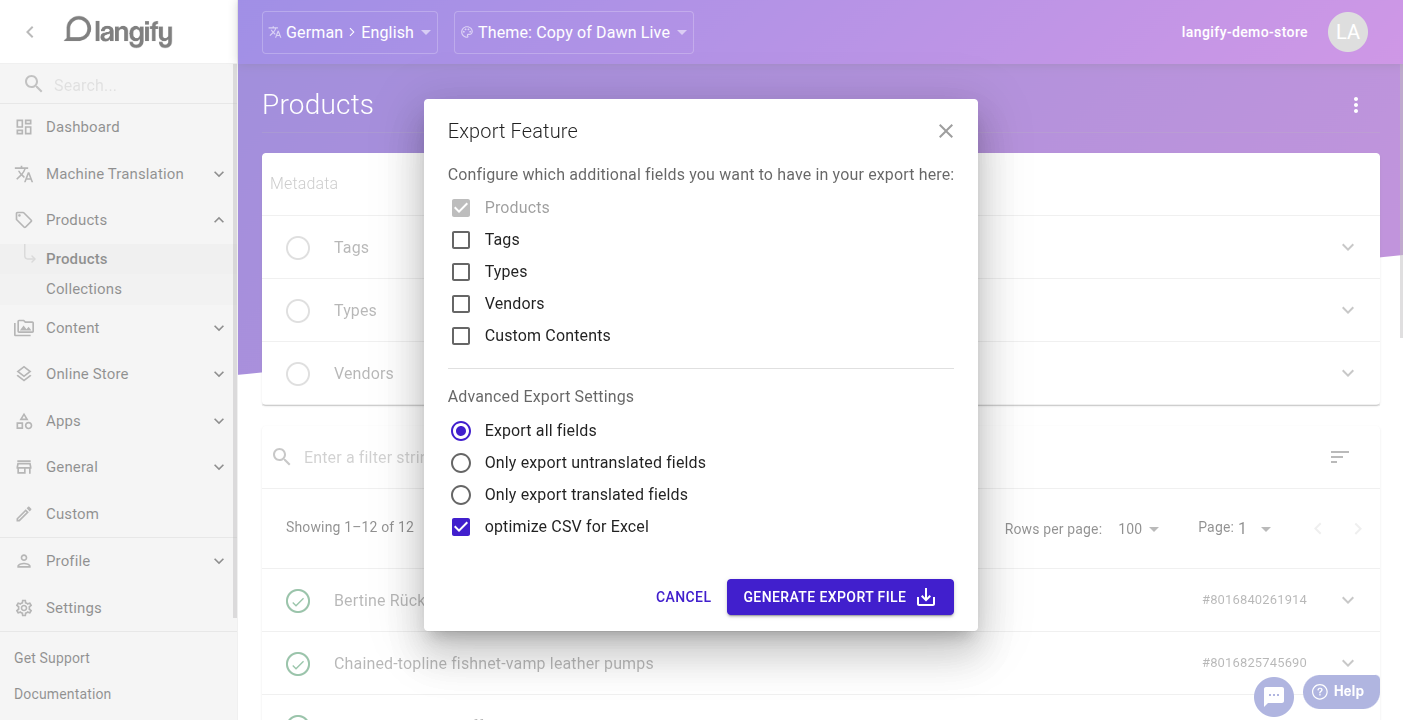
Click on Generate Export File to proceed. Depending on how much content needs to be exported, this might take a few seconds or even several minutes if you're exporting tens of thousands of product translations.
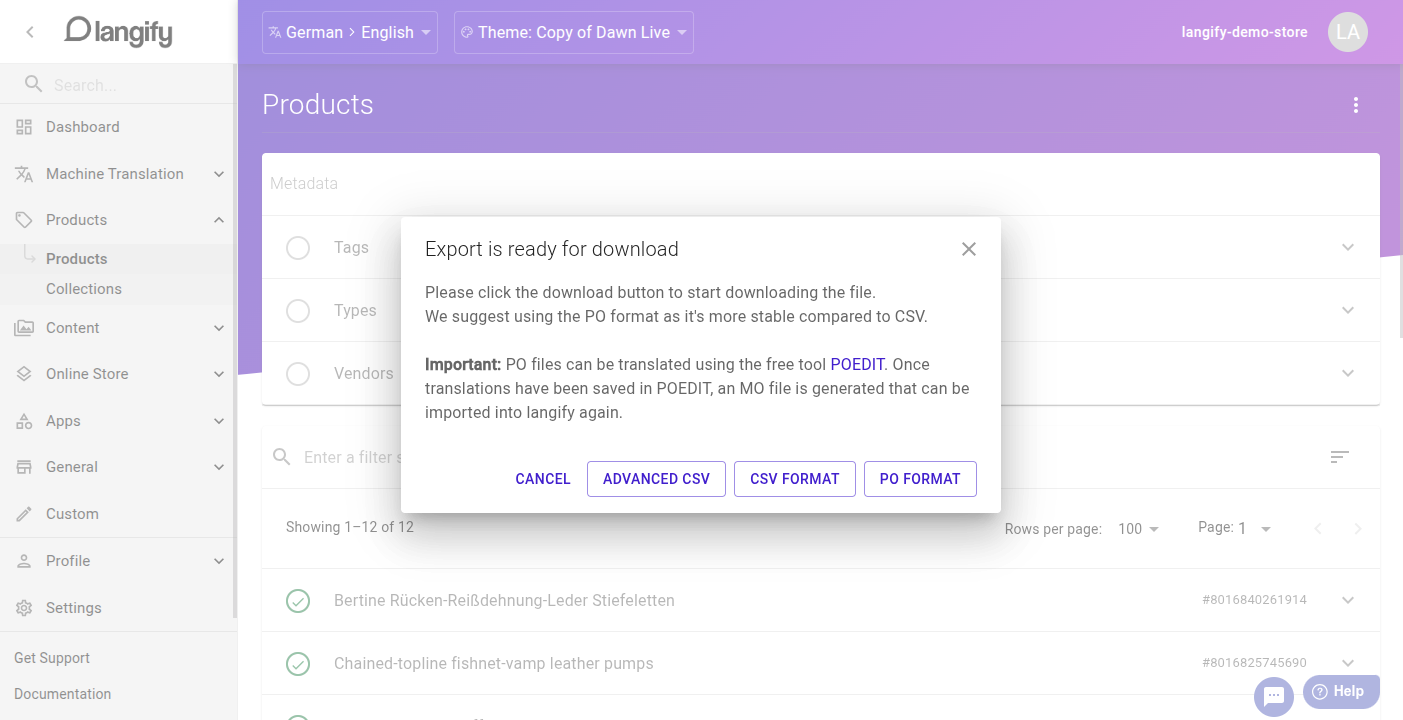
Once the export file is ready, you can download it as CSV or PO. See the export formats below for details.
You can edit your translations inside the exported file and afterwards import the file back into langify.
Export options
When exporting, you can choose from three formats:
- PO/MO
- CSV
- Advanced CSV
Each format has different benefits and requirements. If you simply want to save a backup of your translations, CSV is a good choice.
PO/MO
PO is a widely used translation format, but it requires additional software to open and edit. You can download a free version at poedit.net. To work with a PO file, please follow these steps:
- Export the PO file from langify.
- Open it in Poedit and make the desired changes to the translations.
- Save the PO file to create an MO file, or choose File > Compile to MO.
- Import the MO file into langify.
When to use: Once you have familiarized yourself with PO, this is a very easy and streamlined approach for human translations. Since PO formatting is strict and specialized, issues with formatting or encoding are rare to non-existent.
CSV
This simple CSV has a two-column structure: source and target. The original text is in source, and the translation goes in target.
On import, langify applies translations to all texts that match the source value.
CSV columns: source, target
If you added any extra columns during editing, remove them before import.
When to use: CSV is a very flexible format and can be read by any spreadsheet software. A caveat of this is that each software handles CSV a bit differently, and formatting and encoding issues can occur if you're not aware of how the file is treated. Always make sure that you save the CSV as comma-delimited UTF-8.
Advanced CSV
The Advanced CSV includes additional columns for the Shopify ID and the field type. With this information, the import updates only texts with matching ID and type.
CSV columns: id, type, source, target
A single quote (') is added before values in ID columns to prevent Excel from truncating long numbers.
When to use: With its additional columns, the Advanced CSV gives you complete control over which translation will be imported for which field.
Shopify Export
You can export the translations of any section not covered by langify (e.g. Metaobjects) directly at Shopify > Settings > Languages. Please refer to Shopify's translation export guide for more details.
- Note that the Shopify export/import uses a different CSV format than langify, and the files are not interchangeable.
- The Shopify export can be used to get a full export of metafield translations, where langify offers an export for product metafields only.
- The Shopify export/import is also recommended if you have a very high amount of content in your store — for example, more than 30,000 products or more than 100,000 metafields.