The Custom section in langify can be used to translate text that cannot be translated out of the box. It's especially useful for the translation of third-party apps like page builders, review apps, search apps, and more — or other special cases where the translation is not natively supported by Shopify. Check out our third-party app integration list.
When using Custom Content, please make sure that langify is published as embedded app to your theme.
Create a Custom Content Entry
To create a Custom Content, simply go to the Custom section in langify and:
- Choose a subsection.
- Create the Custom Content entry.
- Enter the original text that you want to translate.
- Click on Save — this will create a new translation field.
- Add your translations to the new field and save again.
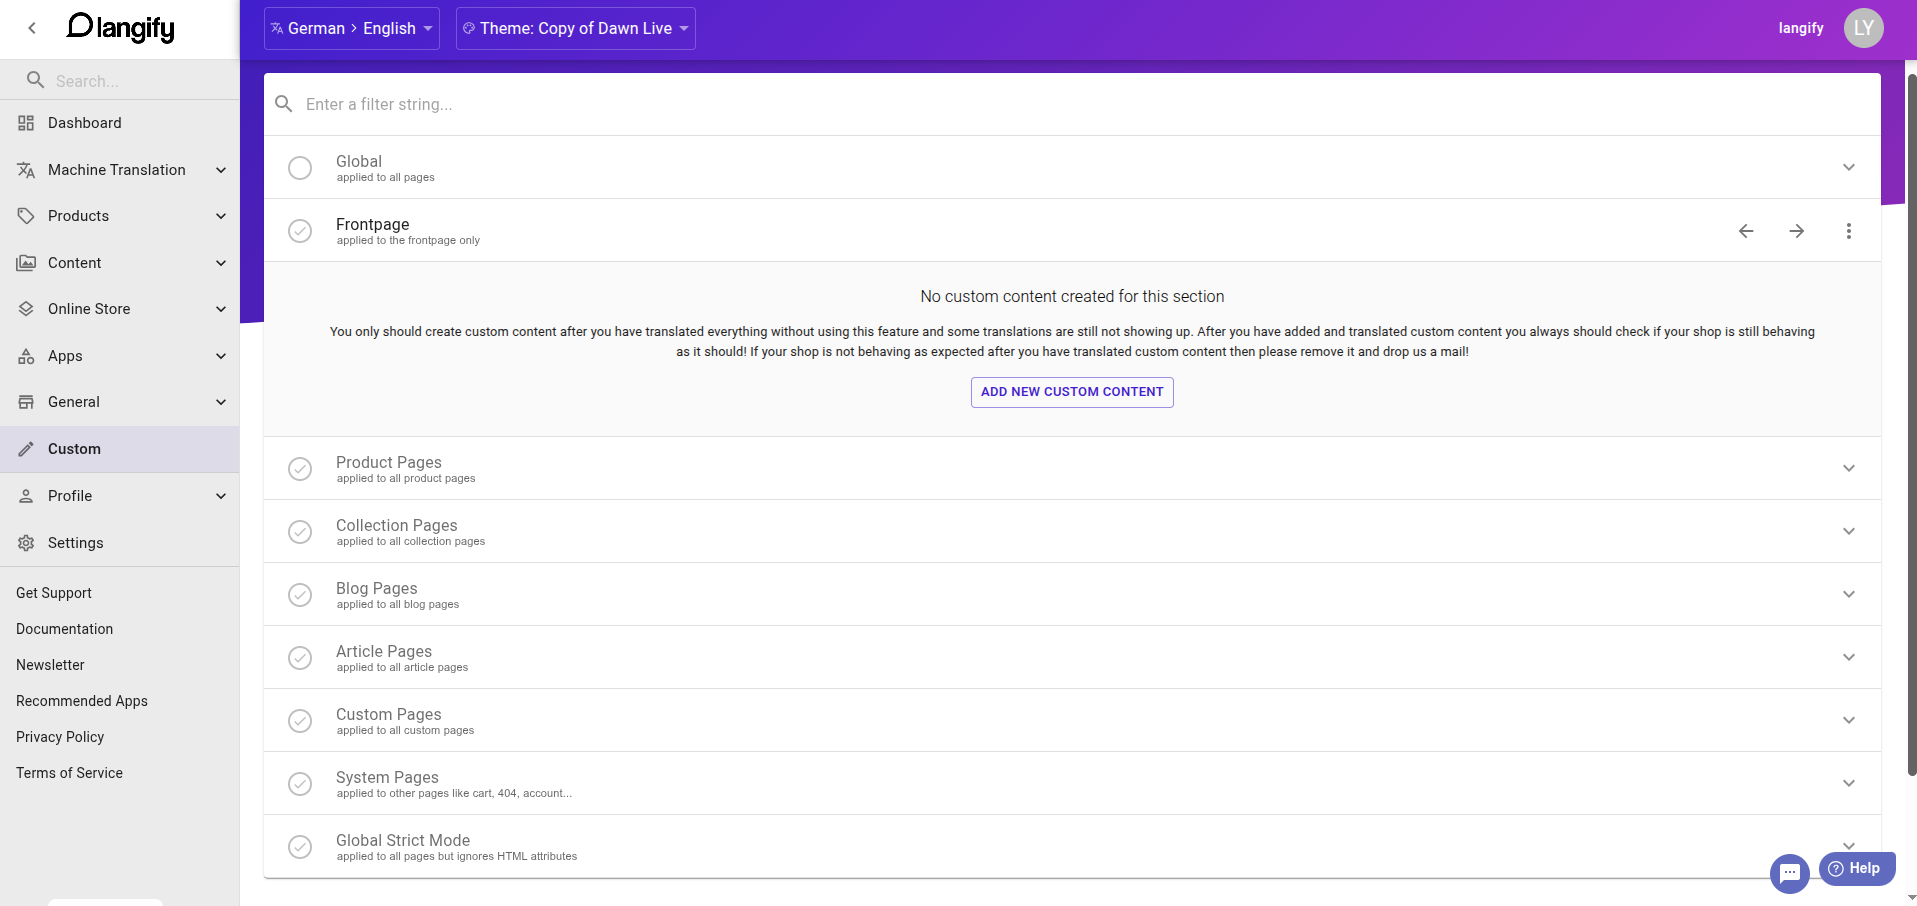
If you haven't added any Custom Contents in this section, then you'll find an Add New Custom Content button.
Otherwise, click on the three-dots icon in the upper right to find this option:

Video Tutorial
This tutorial shows how to translate two lines of text on the homepage.
Subsections
The additional subsections are useful for organization, manageability, and performance. Each subsection also acts as a scope, controlling where each Custom Content entry is loaded — this keeps the speed impact as minimal as possible.
For example, a Custom Content added to Global will be loaded everywhere on your store. If you only need the translation on product pages, add it to the Product Pages subsection instead — it will then load exclusively on product pages.
The available subsections are:
- Global — applied to all pages of your store
- Frontpage — homepage only
- Product Pages — all product pages
- Collection Pages — all collection pages
- Blog Pages — all blog pages
- Article Pages — all article pages
- Custom Pages — all custom pages
- System Pages — all other pages (e.g. cart, search, 404)
- Global Strict Mode — applied to all pages of your store, but only client-side for text nodes and placeholder attributes. This is helpful if you need to ensure that no code-relevant text is translated.
If you're not sure what kind of subsection to use for your text, you can check the URL of the page where the text appears.
If the URL contains /products/, then this is a Product page. If it contains only /collections/, then it is a Collection page.
Individual Custom Content Translations
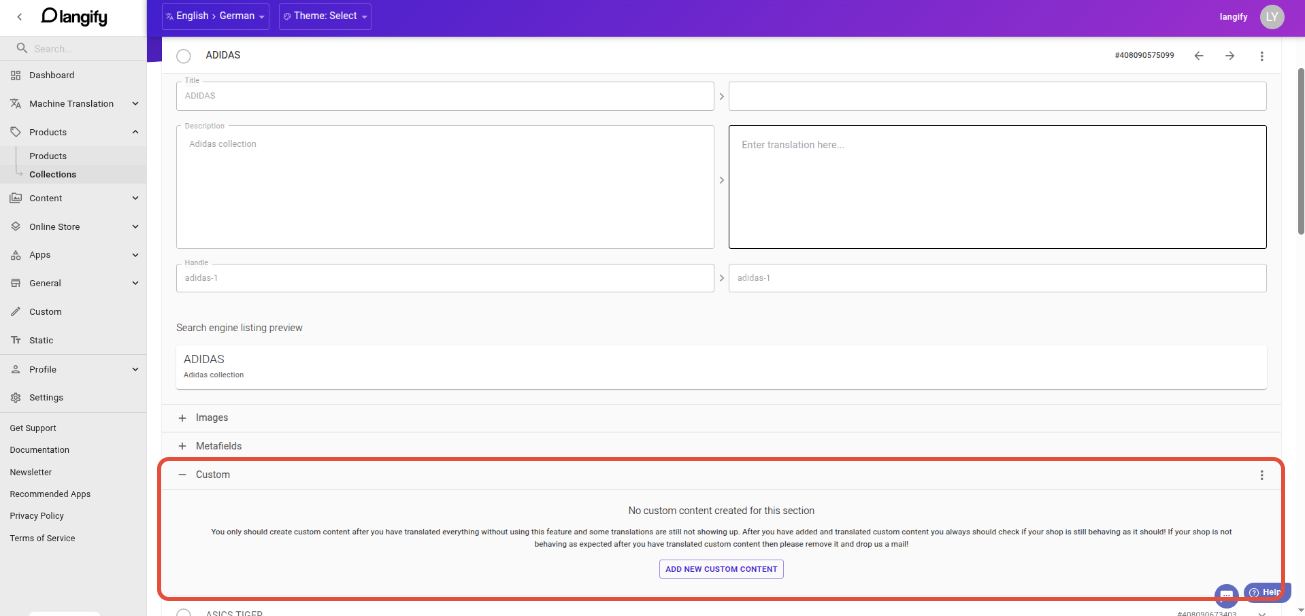
You can create a more specified Custom Content for a single product, collection, article, or page in the respective item under the Custom tab. A translation added here is applied to this item only.
- Click on the item in langify, for example, a product, collection, or page.
- Scroll down to the Custom tab.
- Add your Custom Content and save.
If there are multiple Custom Contents in the different subsections for the same original text, then the more specific translation will be used.
Important
- Custom Content translations should only be used if the text cannot be translated within any other section.
- Since Custom Content translations have to be injected separately, an excessive amount can slow down the page. As a rule of thumb, do not add more than 250 Custom Content translations per subsection. If you're seeing a "Memory Limits Exceeded" error in your storefront, please check our guide "Memory Limits Exceeded" Liquid Error on how to fix this.
- After adding Custom Content translations, always double-check if your store still behaves correctly — especially if you have added the langify Polyfill code to your theme as this enables Custom Content to translate HTML attributes.
Tips & Tricks
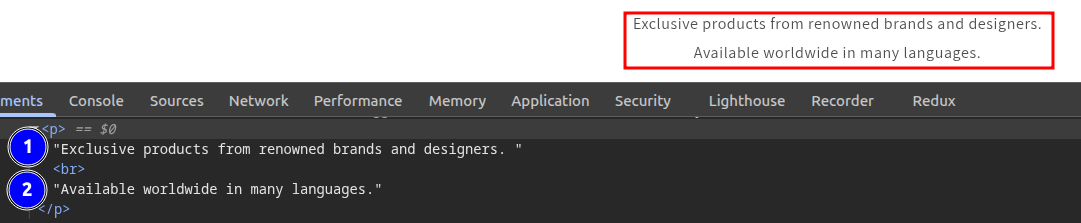
- Use the browser's Inspect tool by right-clicking on the text you want to translate and then selecting Inspect. This helps to find the correct text to create the Custom Content. Each text string needs its own Custom Content entry.
 Check out our guide on translating formatted text with Custom Content for more detailed information.
 - If your text contains dynamic values like a number of days or weeks, use Custom Content with Placeholder Matching to cover all variations of the text with just one Custom Content.
- You can click on the plus icon at the bottom of the Custom Content creation overlay to create more than one Custom Content in one go. It is however recommended, not to create more than a dozen Custom Contents at once.

Limitations
There are some cases where Custom Content translations cannot be applied:
- Content loaded via an iframe or shadowroot from an outside source (e.g. Loox reviews).
- Checkout pages, due to security restrictions.
- Notifications, and the new customer account pages, as these are handled separately from your theme.
If your Custom Content does not translate and you're not sure why, just let us know at support@langify-app.com and we will take care of the issue!
Technical
Out of the box, Custom Content translations are applied via JavaScript client-side, provided that langify is published as an embedded app to your theme. These translations are only applied to text nodes and placeholder attributes.
If you have added the langify Polyfill code to your theme, then Custom Content translations are additionally applied server-side via Liquid. Translations are applied to any text within > and <, or within quotes. This includes text nodes and all HTML attributes.
Custom Content entries added in the Global Strict Mode subsection are an exception — they are always applied only via JavaScript and are ignored by the Polyfill code.